Backup your Win8 computer to your Synology NAS

I love my Macbook Pro which I’ve been using now for about 6 years. At work I’m a PC user and lately I acquired a Surface Pro 3 as well. That said, one of the things I liked about my Mac or better, about OSX is Timemachine. Once configured it silently runs in the background and makes sure you have everything backed up. Now having my Surface I obviously wanted the same on my Windows machine. The answer is File History. Here’s how I configured it to work with my Synology NAS (but you can easily adopt it for your NAS system).
Configure your Synology NAS
I’m running a Synology disk station DS414j with DSM 5.1 installed on it. Still, you may easily be able to apply similar steps to your system.
Create a shared backup folder
First of all, create a new shared folder that will be used as the container for your windows backups. Note, this folder can be used to backup multiple user/windows machines. Open the Control Panel on your Synology web interface and navigate to “Shared Folder”. Create a new one.
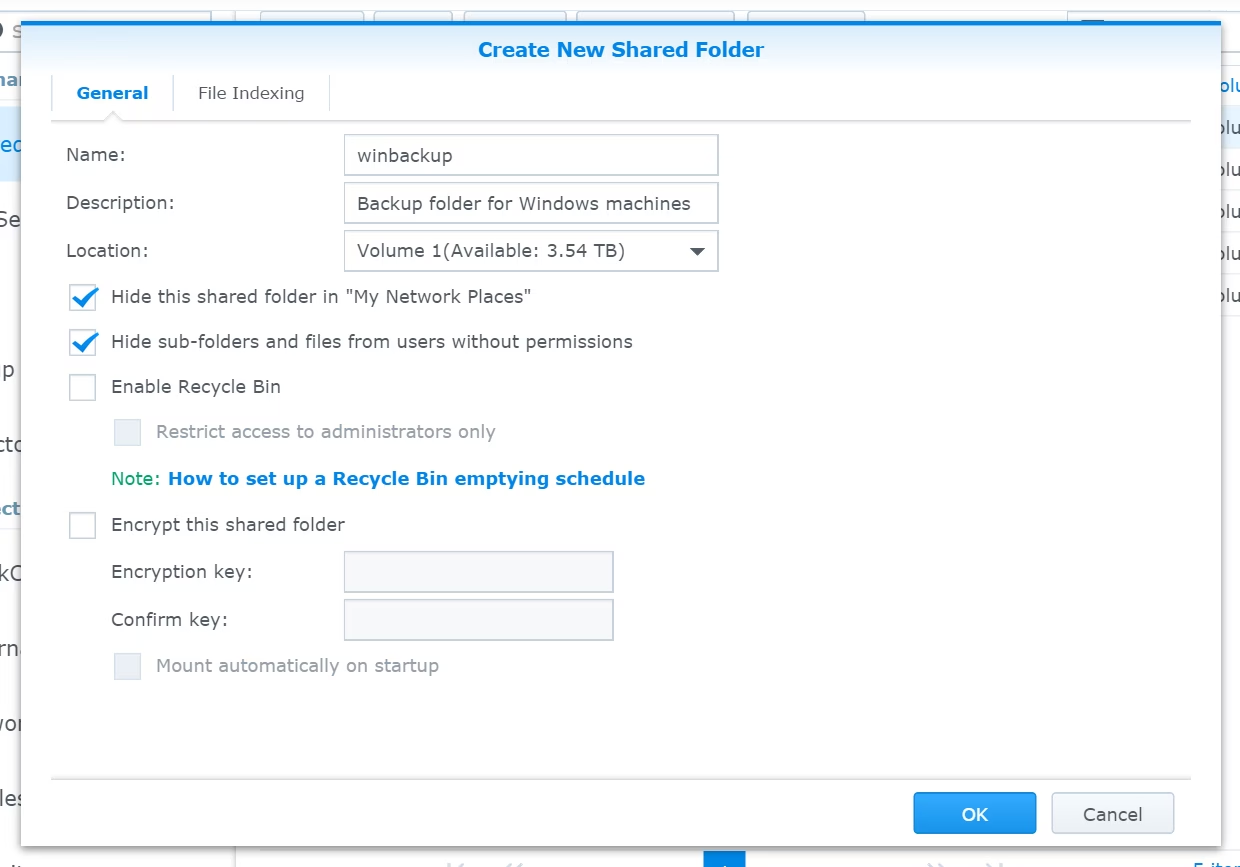
That’s it. Now continue by creating a new backup user.
Create a backup user
I suggest you to configure a separate user account on your Synology NAS which is exclusively used for performing the backup.
Note: This approach is useful for imposing different quota limits to the backup and your “usual” Synology account. For instance, I normally use an account “juri” to my disk station, for deploying files, videos, photos and so on. I wouldn’t want to share the quota of that account with the one used for backups. Since you can only impose quotas at the account level I tend to create a different ones.
Obviously, if you don’t have such a requirement or for other “non-powerusers” in your network, you can also use the same account.
To create a backup account simply login to your Synology web interface, open the Control Panel and navigate to “User”. Create a new account.
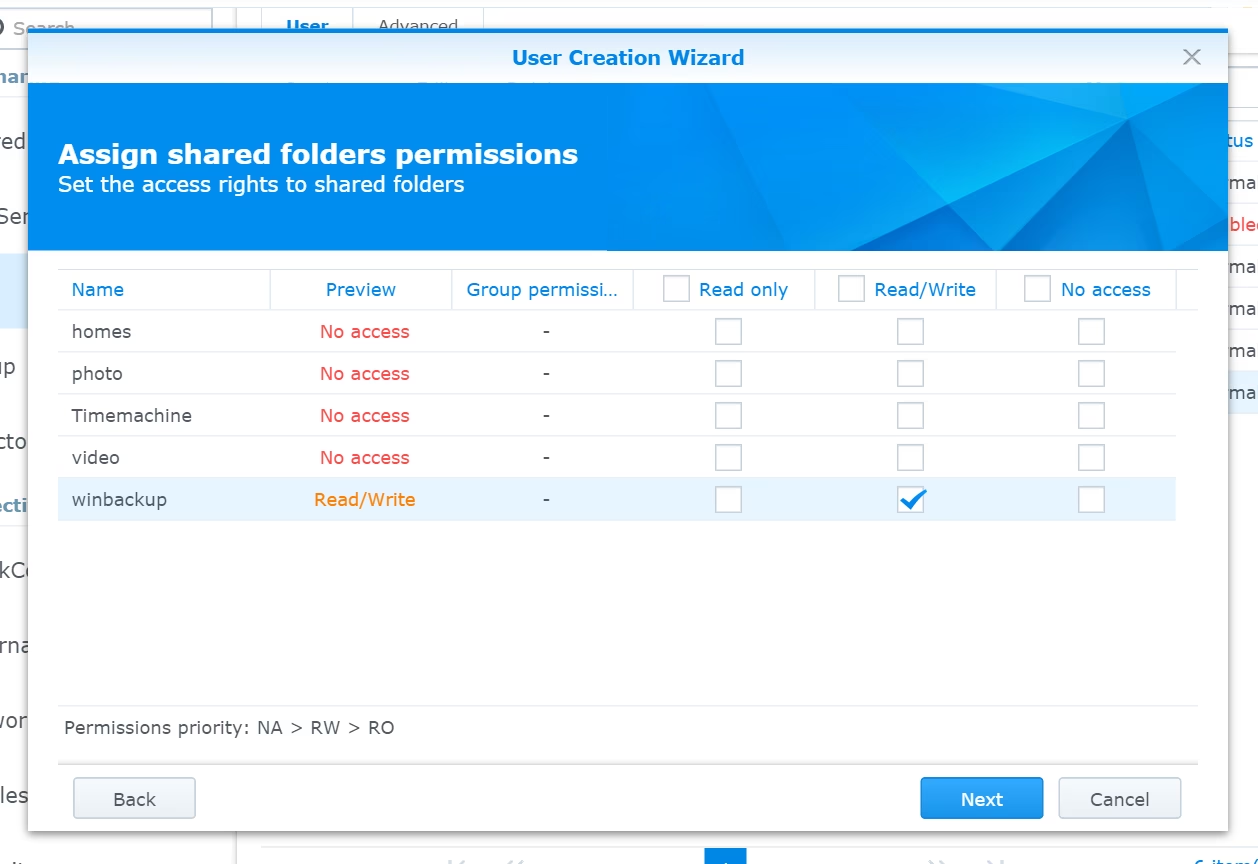
On the access rights page give it read/write access to the backup folder on your disk station.
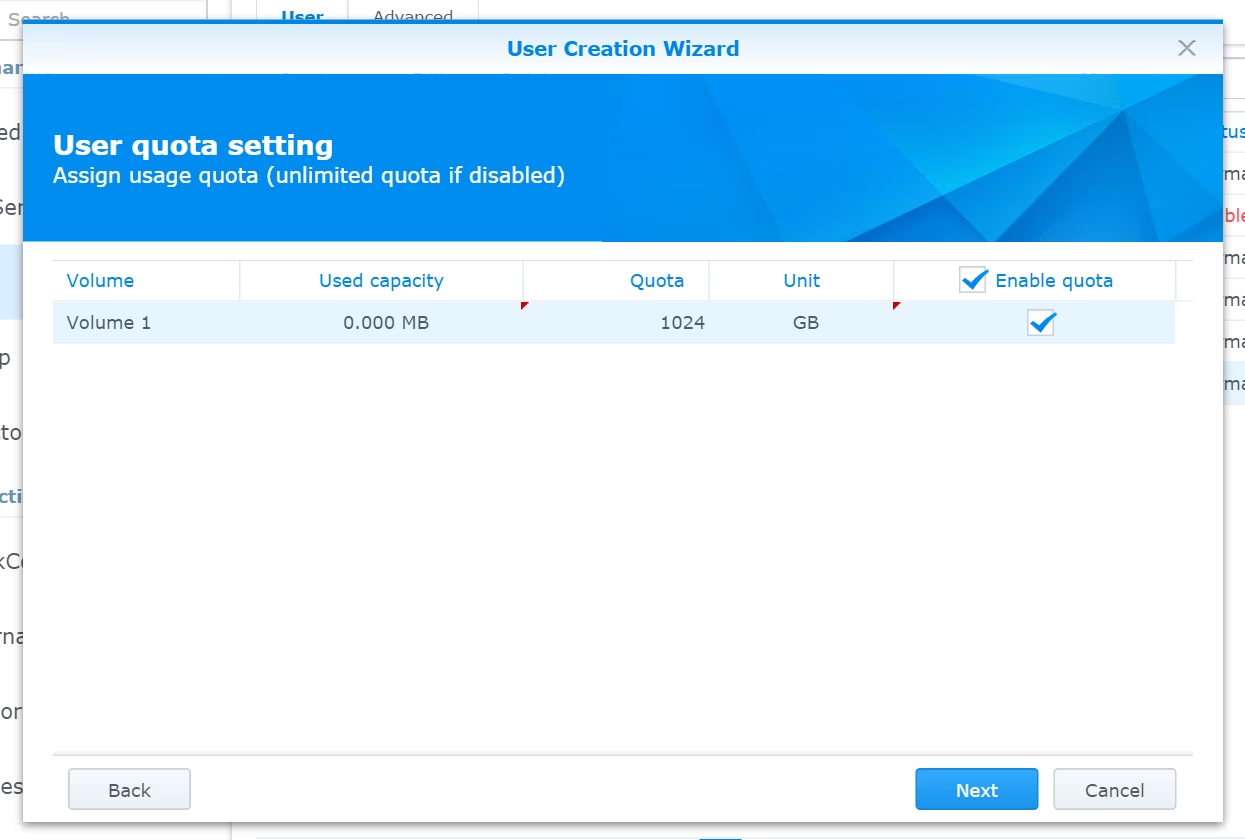
Next, set a quota limit. As mentioned before, this is suggested in order to limit the amount of space that can possibly be used by your backup.
Continue till the end of the account creation wizard and apply your configuration.
Enable Windows File History
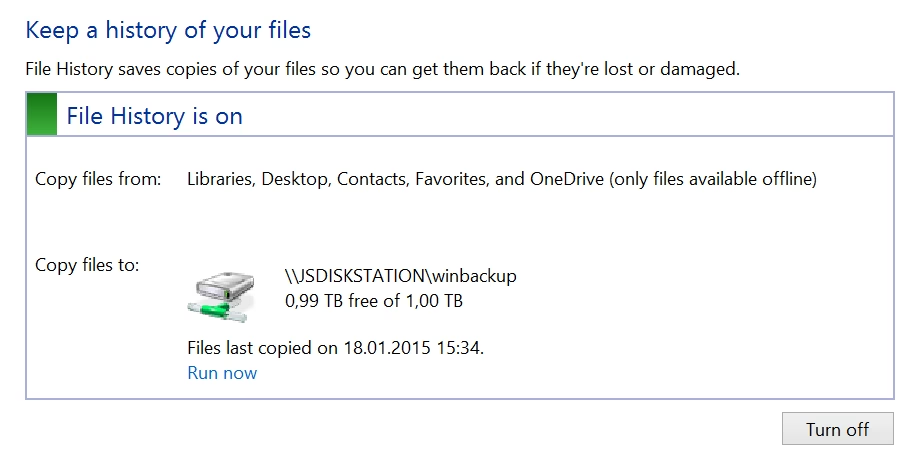
The OSX Timemachine like service on Windows 8 is called File History. Simply search for it. The following image shows my currently working setup.
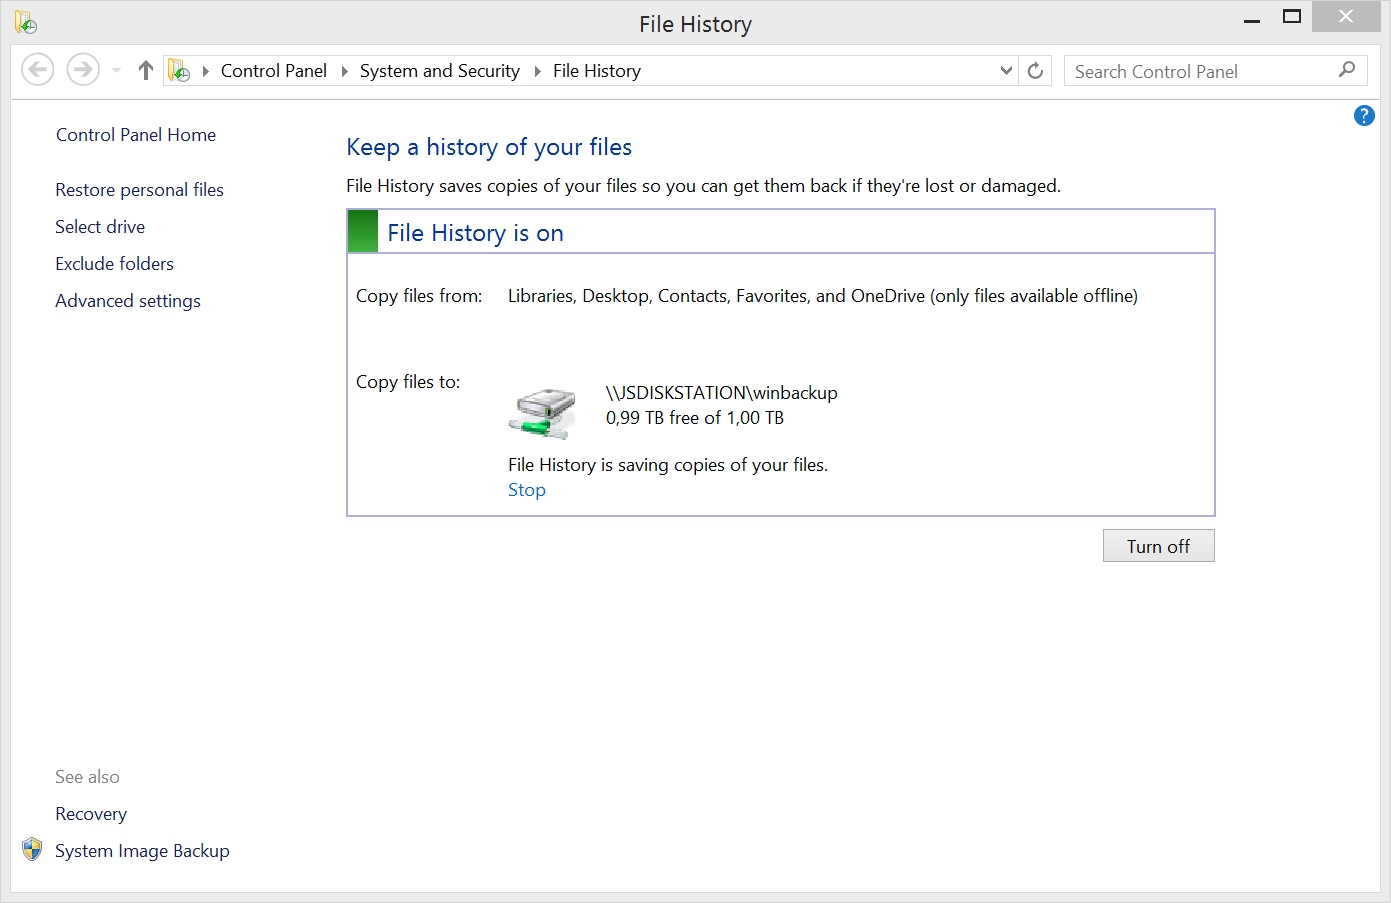
When you first configure it, you obviously won’t see anything there. Click on “Select drive” to select the network location where you want to host your backup data.
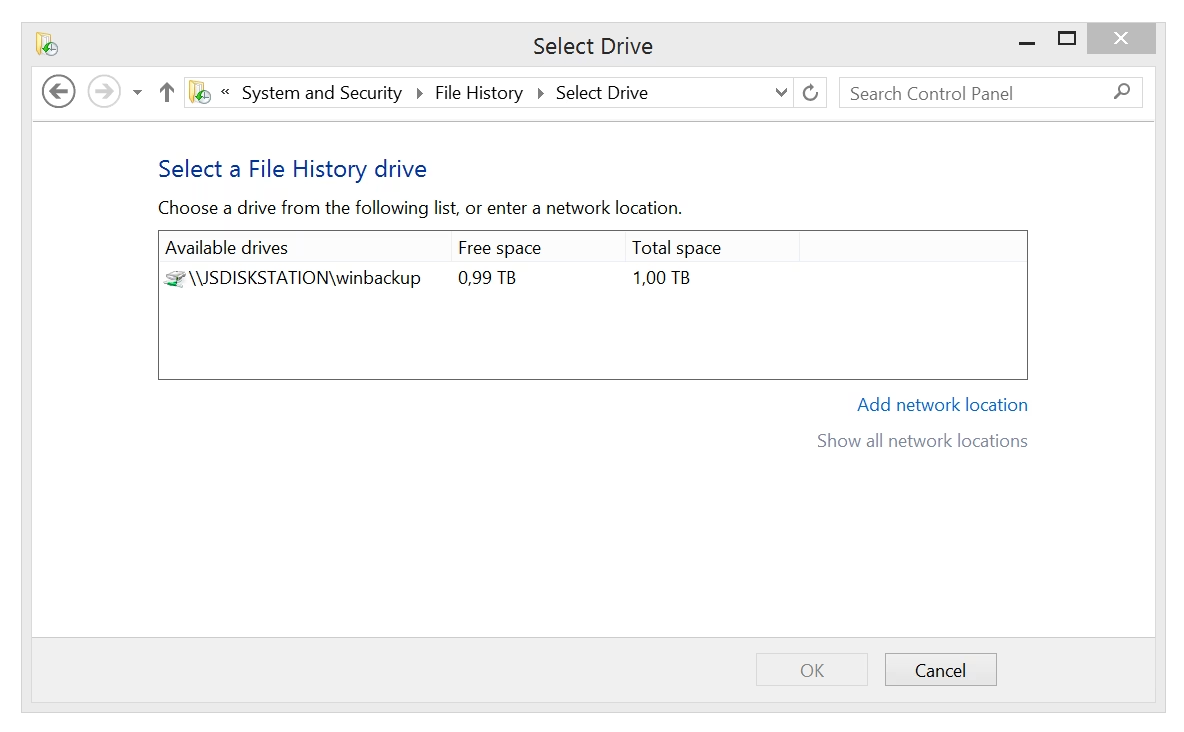
Once that is set up, you can simply click the “Turn on” button to enable File History.
Note, make sure you use the correct credentials, that is your backup account you previously created (if you did so). If you previously connected with a different account, Windows might automatically use that one. In that case you can reset the credentials that are used to connect to your Synology. Press Win+R and enter the following:
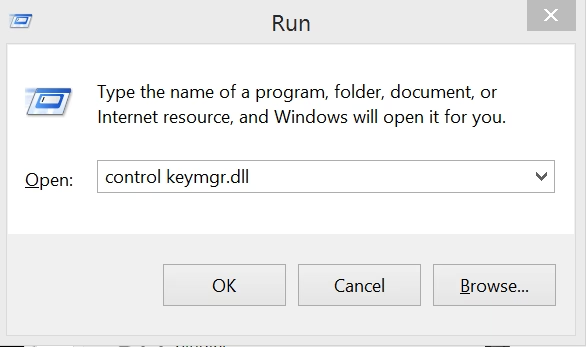
Remove any credentials related to your Synology disk station. Reboot your system and then open the “File History” window again. You should now be prompted to enter your credentials.
At this point you should have a working backup of your files. To be sure check the contents of the shared folder you setup before on your disk station.
What exactly is backed up?
Good question. Windows File History backups your “Libraries”, that is
- Documents
- Music
- Pictures
- Videos
- Desktop
- Downloads
To be honest I never really payed attention to the concept of “Libraries” till now. But don’t be afraid, if you have other folders on your hard disk you’d like to backup which don’t reside inside one of the mentioned libraries, you can.
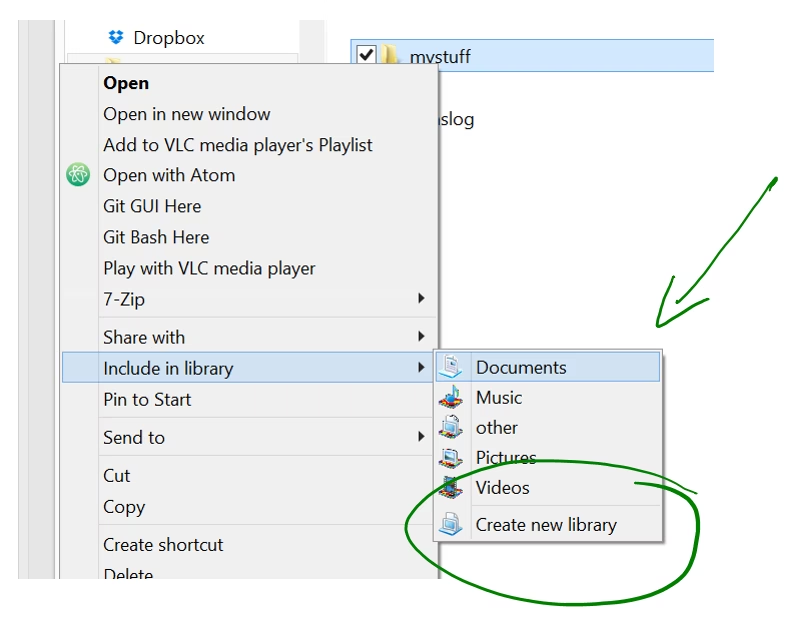
What you have to do is to either create a new library or add your folder to an existing one. Adding your folder to an existing library is as easy as to right-click on the folder and then select “Include in library” and choose a suitable one or click the “Create new library” button.
Conclusion
For a long time creating backups on Windows was a painful process. Usually you had to rely on some third party applications which you had to configure. When I bought a Mac years ago, one of my favorite features was Timemachine. I configured it, connected it to an external storage and simply forgot about it. You could be sure to always have proper backups in place.
File History comes very close to such a system although I found its setup and configuration a little more cumbersome. Especially the fact it only backs up (what is called) Libraries is kinda odd and might not be easily understandable by the average user.
(Scott Hanselman has an article on configuring File History as well which you might take a look at)